
Setup Promotions and Discounts
Want to set up promotions and discounts on your products? Would you like to give your users free supplementary items? You can offer your customers a fixed value, percentage, or discount on products.
You can also specify the dates for which the discount is valid, the minimum quantity required to apply the discount, and to which products, or variants the discount can be applied. You can apply a discount on the number of products.
In this tutorial, I will show you how to create a discount configuration. The steps are very simple. Let us take an example to better explain the process. Imagine you have to create a discount on your product that says, “All order quantity above 3 will get a 20% discount”. Here’s how to do it in EFFORT.
Create Discount and Supplementary Lists
-
As a first step, you need to create the following list specs with the
fields, as shown in the screenshots. To know more about how to create a list
spec, refer to Create List.
- Promotion Details. Refer Promotion Configuration - List
Fields to know about fields required to create Promotion
list spec.

- Scope

- Customer Groups

- Product. Refer Product Configuration - List
Fields to know about fields required to create Promotion
list spec.

- Unit of Measurement

- Product Price. Refer Product Price Configuration -
List Fields to know about fields required to create
Promotion list spec.

- Promotion Details. Refer Promotion Configuration - List
Fields to know about fields required to create Promotion
list spec.
-
Now create the Discount and Supplementary list specs using
the above list specs as shown in below screenshot.
- Discount. Refer Discount Configuration - List
Fields to know about fields required to create Promotion
list spec.

- Supplementary. Refer Supplementary Configuration -
List Fields to know about fields required to create
Promotion list spec.

- Discount. Refer Discount Configuration - List
Fields to know about fields required to create Promotion
list spec.
- After creating the list specs, you need to add items to all of them.
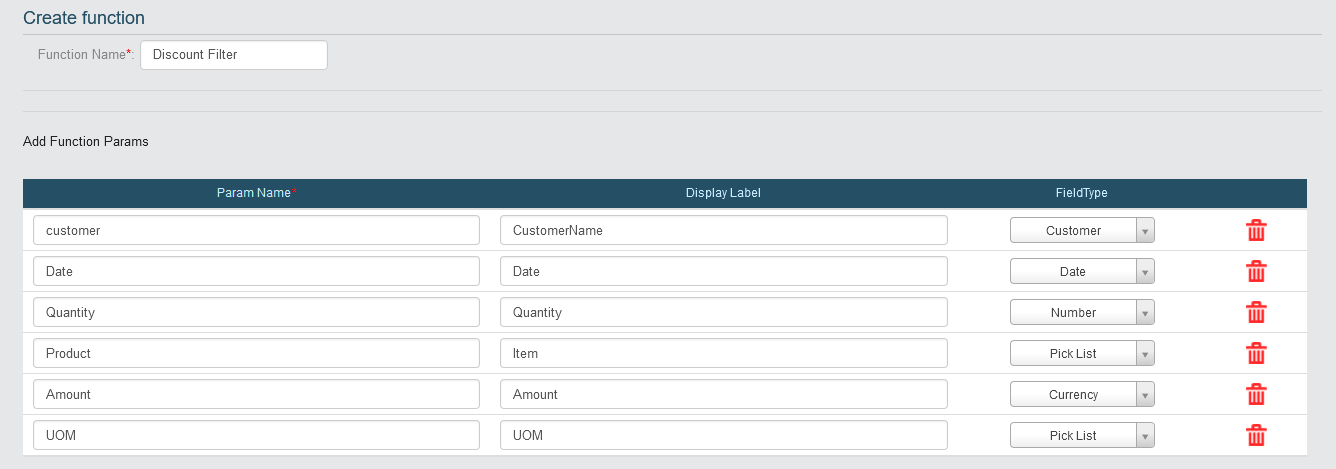
Define Filter Functions to Discount
-
Now, you need to create filter functions for the Discount list
spec.
Refer to Create Filter Functions for more details.
-
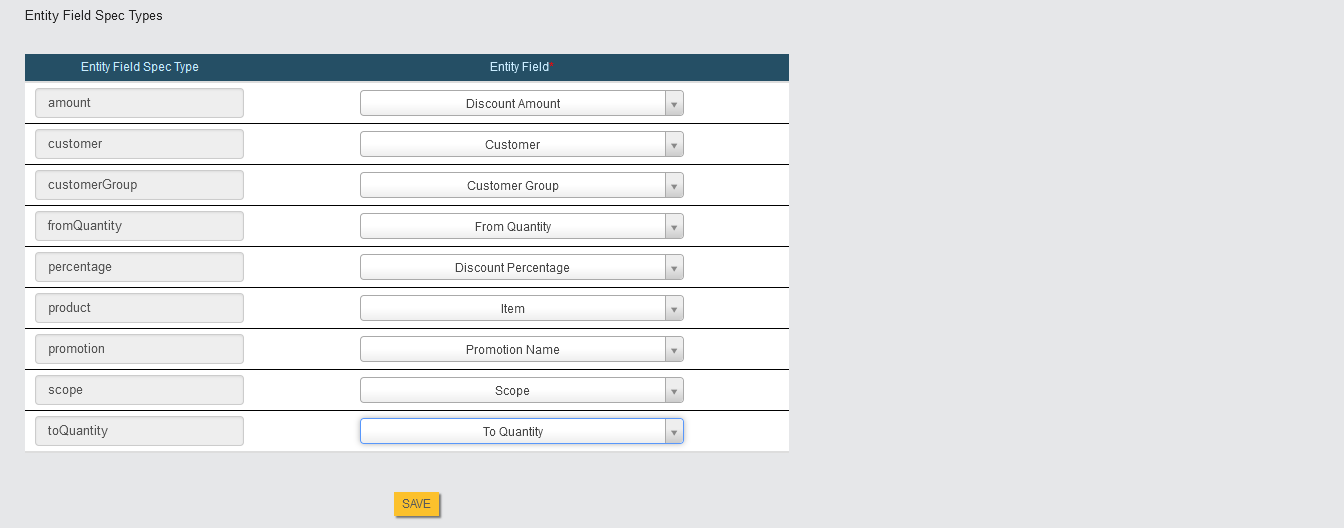
Define the function parameters as shown in the below image.
Create a Sales Invoice Form
-
Now create a sales invoice form.
For more information, refer to Create a Form.
- You need to create the sales invoice form with the fields given in the below link.
-
In this tutorial, we created the sales invoice form with the fields as
shown in the screenshots.

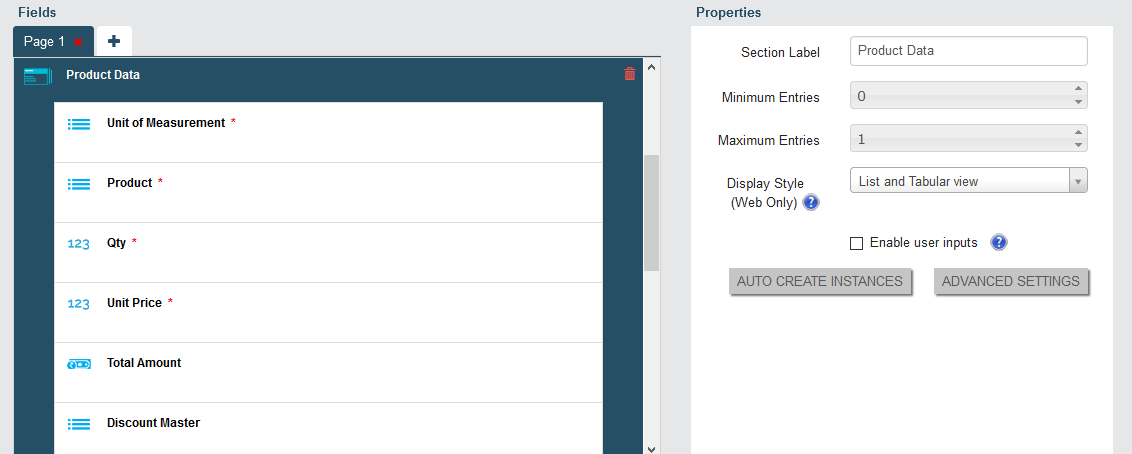

- Configure lists such as Customer Groups, Unit of Measurement, Product, and FOC Material to the appropriate form fields.
-
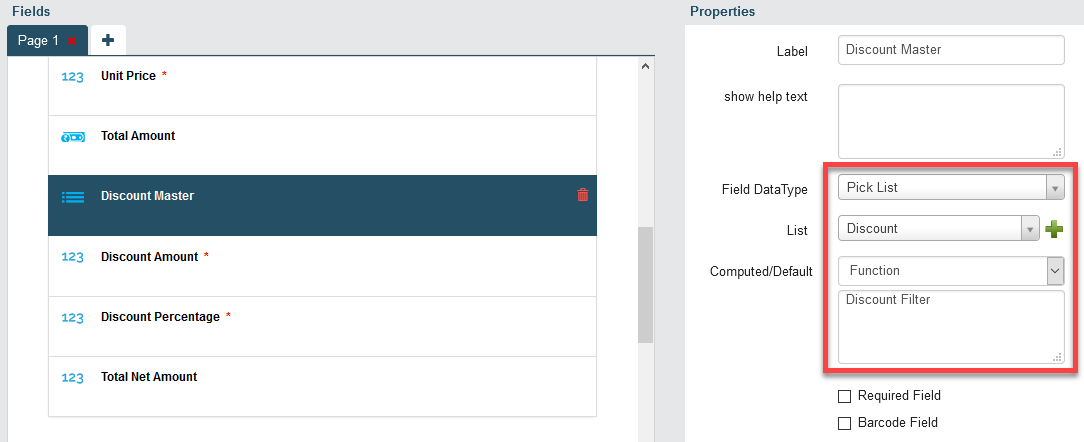
Make Discount Master field as a Function field.
-
Now click on the textbox under the Computed/Default field and
configure inputs to the parameters as shown in the screenshot.

- Click Save.
Configure Promotion and Discounts
-
After saving the form, scroll down to the Utilities
section. Click on the Configure Promotions and
discounts card.

-
Now enable the below checkboxes and configure as shown in the
screenshot.
- Enable Discount
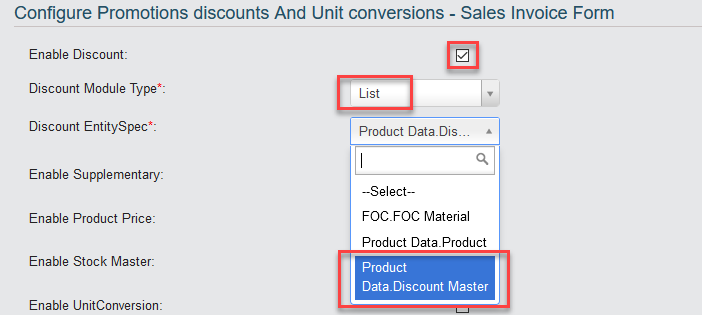
- Enable Supplementary
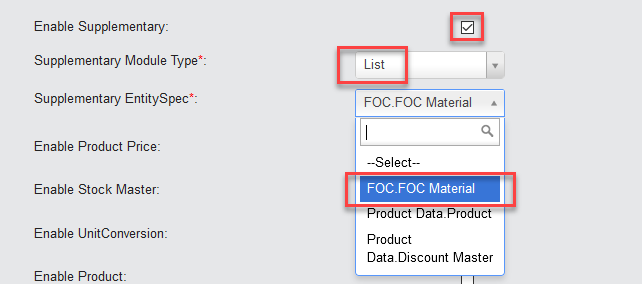
- Enable Product Price
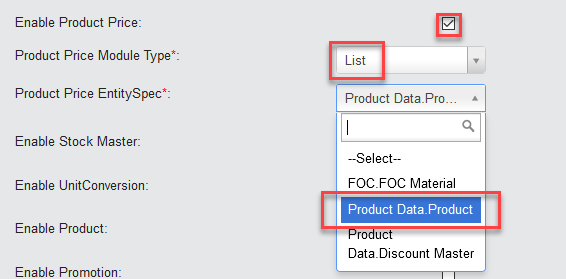
- Enable Product
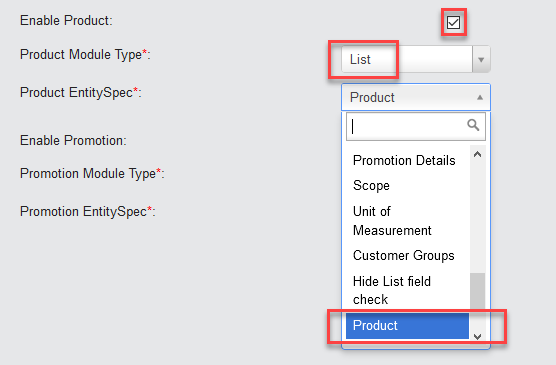
- Enable Promotion

- Enable Discount
- Click Save.
Promotion and Discounts List Configuration
-
First, create the Promotions list configuration as shown in the
screenshot. To create, refer to Create Promotions List
Configuration for more information.

-
Now create the Product list configuration as shown in the
screenshot. To create, refer to Create Product List Configuration
for more information.

-
In the same way, create the Product Price list configuration as
shown in the screenshot. To create, refer to Create Product Price List
Configuration for more information.

-
Similarly, create the Discount list configuration as shown in the
screenshot. To create, refer to Create Discount List Configuration
for more information.
-
Now create the Supplementary list configuration as shown in the
screenshot. To create, refer to Create Supplementary List
Configuration for more information.

Promotion and Discounts Form Configuration
- As a final step, we need to create SalesInvoice form configuration. To create, refer to Create Sales Invoice Form Configuration for more information.
-
Now configure the fields as shown in the below screenshot.
